Many flowers and vegetables may be started from seeds indoors. Vigorous plants started indoors flower sooner and produce an earlier harvest than plants started outdoors. Seeds of certain species, however, are best sown directly outdoors when weather conditions permit and are actually delayed by transplanting.
Growing plants from seeds can be a rewarding hobby and also allows home gardeners to grow varieties that might not be available from local plant outlets.
Seeding date
The proper time for sowing seeds indoors depends on the amount of time required for the species in question to develop a healthy transplant of appropriate size to be moved outdoors. This period may range from 3 to 15 weeks, depending on species and the cultural conditions in the home (see Tables 1 and 2).
Additionally, the date at which a species may be transplanted into the garden must be considered when establishing a seeding date. Cold-tolerant plants such as pansy and cabbage often can be set out in late March or early April and must be seeded relatively early in the year. Heat-loving plants such as vinca and watermelon should not be set out until the weather has warmed, usually in late May, and should be started later.
Table 1. Guide to sowing common annual flower seeds in the home.
| Flower type | Seeding date1 | Germination time | Growing temperature | Crop time | Comments |
|---|---|---|---|---|---|
| Ageratum | Early March | 5 to 8 days | 60 to 65 degrees F | 10 to 11 weeks | Needs light to germinate. |
| Alyssum, sweet | Late March | 4 to 8 days | 50 to 55 degrees F | 8 to 9 weeks | Needs light to germinate. |
| Aster | Early April | 8 to 10 days | 60 to 62 degrees F | 7 to 8 weeks | |
| Begonia, fibrous | Early to mid-January | 10 to 12 days | 60 degrees F | 16 weeks | Needs light to germinate. |
| Celosia | Early April | 6 to 10 days | 65 to 68 degrees F | 10 to 12 weeks | Don’t grow cool. |
| Cleome | Early to mid-April | 10 to 12 days | 70 to 75 degrees F | 7 to 9 weeks | Transplant before flowering. |
| Coleus | Early March | 8 to 10 days | 65 to 75 degrees F | 9 to 10 | Needs light to germinate. |
| Cosmos | Mid-April | 5 days | 65 degrees F | 4 to 6 weeks | |
| Dianthus | Early March | 5 to 7 days | 50 to 55 degrees F | 12 to 14 weeks | Cover seeds lightly. Grow cool. |
| Dusty Miller | Early March | 10 to 15 days | 60 to 65 degrees F | 11 to 12 weeks | Needs light to germinate. |
| Geranium, seed | Early February | 7 to 10 days | 60 to 65 degrees F | 13 to 15 weeks | Best if grown in small pots. |
| Gomphrena | Late March | 10 to 14 days | 68 degrees F | 9 to 10 weeks | Crop time for dwarf types. |
| Impatiens | Mid-February | 15 to 18 days | 58 to 60 degrees F | 10 to 11 weeks | Cover seeds lightly. |
| Lobelia | Early February | 15 to 20 days | 60 degrees F | 11 to 12 weeks | Needs light to germinate. |
| Marigold | Early April | 5 to 7 days | 65 to 68 degrees F | 8 to 12 weeks | Tall types require more time. |
| Melampodium | Early April | 7 to 10 days | 60 to 62 degrees F | 7 to 8 weeks | |
| Nicotiana | Late March | 10 to 15 days | 60 to 62 degrees F | 9 to 10 weeks | Needs light to germinate. |
| Nierembergia | Late March | 10 to 15 days | 60 to 62 degrees F | 10 to 11 weeks | Keep cool during germination. |
| Pansy/Viola | Early to mid-January | 6 to 10 days | 50 to 55 degrees F | 14 to 15 weeks | Grow at cool temperatures. |
| Pepper, ornamental | Early to mid-April | 8 to 10 days | 60 degrees F | 11 to 14 weeks | |
| Petunia | Late February | 6 to 12 days | 55 to 60 degrees F | 12 to 13 weeks | Needs light to germinate. |
| Phlox, annual | Late March | 6 to 10 days | 50 to 55 degrees F | 10 to 11 weeks | Direct seed into containers. |
| Portulaca | Early April | 6 to 10 days | 65 degrees F | 12 to 13 weeks | Needs light to germinate. |
| Salvia | Mid-March | 12 to 15 days | 60 degrees F | 9 to 11 weeks | Needs light to germinate. |
| Snapdragon | Early March | 7 to 12 days | 45 to 50 degrees F | 15 to 16 weeks | Needs light. Grow cool. |
| Statice | Mid-March | 15 to 20 days | 50 to 55 degrees F | 8 to 10 weeks | Grow at cool temperatures. |
| Stock | Early February | 10 to 14 days | 50 to 55 degrees F | 9 to 10 weeks | Grow at cool temperatures. |
| Torenia | Mid-February | 10 to 15 days | 55 to 60 degrees F | 12 to 13 weeks | Needs light to germinate. |
| Verbena | Early March | 12 to 20 days | 55 to 60 degrees F | 12 to 13 weeks | Chill seeds before sowing. |
| Vinca | Mid-March | 10 to 15 days | 65 to 68 degrees F | 14 to 15 weeks | Grow in warm temperatures. |
| Zinnia | Mid-April | 5 to 7 days | 60 degrees F | 8 to 9 weeks | Direct seed into final container. |
1Approximate seeding date listed is for mid-Missouri (Zone 5). In the Bootheel area (Zones 6/7), sow one to two weeks earlier. In northern Missouri, sow about one week later.
Table 2. Guide to sowing vegetable seeds in the home.
| Vegetable type | Seeding date1 | Germination time | Growing temperature | Crop time | Comments |
|---|---|---|---|---|---|
| Broccoli | Late February | 5 to 10 days | 50 to 60 degrees F | 6 to 8 weeks | Grow cool. Tolerates light frost after hardening. |
| Brussels sprouts | Late February | 5 to 10 days | 50 to 60 degrees F | 6 to 8 weeks | Grow cool. Tolerates light frost after hardening. |
| Cabbage | Late February | 5 to 10 days | 50 to 60 degrees F | 6 to 8 weeks | Grow cool. Tolerates light frost after hardening. |
| Cauliflower | Late February | 5 to 10 days | 50 to 60 degrees F | 6 to 8 weeks | Grow cool. Tolerates light frost after hardening. |
| Cucumber | Late April | 7 days | 60 to 62 degrees F | 3 to 5 weeks | Sow directly in pots. Keep warm at all times. |
| Eggplant | Late March | 7 to 14 days | 62 to 65 degrees F | 6 to 8 weeks | Keep warm. Do not subject to frost. |
| Head lettuce | Late February | 5 to 10 days | 50 to 60 degrees F | 6 to 8 weeks | Grow cool. Tolerates light frost after hardening. |
| Kale/Collards | Late February | 10 days | 50 to 60 degrees F | 6 to 8 weeks | Grow cool. Tolerates light frost after hardening. |
| Muskmelon | Late April | 7 days | 60 to 62 degrees F | 3 to 5 weeks | Sow directly in pots. Keep warm at all times. |
| Okra | Late April | 7 to 14 days | 60 to 62 degrees F | 4 to 6 weeks | Sow directly in pots. Keep warm at all times. |
| Pepper | Late March | 7 to 14 days | 62 to 65 degrees F | 6 to 8 weeks for packs 8 to 10 weeks for pots |
Keep warm. Do not subject to frost. |
| Pumpkin | Late April | 7 days | 60 degrees F | 4 to 6 weeks | Sow directly in pots. Keep warm at all times. |
| Squash | Late April | 7 days | 60 to 62 degrees F | 3 to 5 weeks | Sow directly in pots. Keep warm at all times. |
| Tomato | Late March | 7 to 14 days | 62 to 65 degrees F | 6 to 8 weeks for packs 8 to 10 for pots |
Keep warm. Do not subject to frost. |
| Watermelon | Late April | 7 days | 60 to 62 degrees F | 3 to 5 weeks for pots | Sow directly in pots. Keep warm at all times. |
1Approximate seeding date listed is for mid-Missouri (Zone 5). In the Bootheel area (Zones 6/7), sow one to two weeks earlier. In northern Missouri, sow about one week later.
Selecting seeds for planting
Purity and trueness to type
Producing quality transplants starts with using good seeds. Seeds should have a high germination percentage and be genetically pure and free from seeds of weeds. For best results, obtain quality seeds from a reliable dealer.
Packages and storage
Seeds sold in packages should show species, variety, germination percentage and chemical seed treatments, if any. Seeds should be kept dry and cool to ensure good germination at planting. Laminated foil packets ensure dry storage. Paper packets are best kept in tightly closed jars containing a desiccant such as silica gel until seeds are planted.
Hybrid seeds
Most new vegetable and flower varieties are hybrids. Because they are more expensive to produce, hybrid seeds often cost more than seeds of nonhybrid varieties. However, hybrids usually have increased vigor, better uniformity, better production and sometimes specific disease resistance or other unique cultural characteristics. Saving seeds from hybrid varieties is not recommended, since the seeds saved will not produce plants like their hybrid parent.
Germination media
The medium used for starting seed should be loose, well-drained and fine-textured. Additionally it should not contain disease organisms or significant amounts or fertilizer. Prepared media possessing these traits are available commercially, or component materials can be purchased and mixed at home (Figure 1).
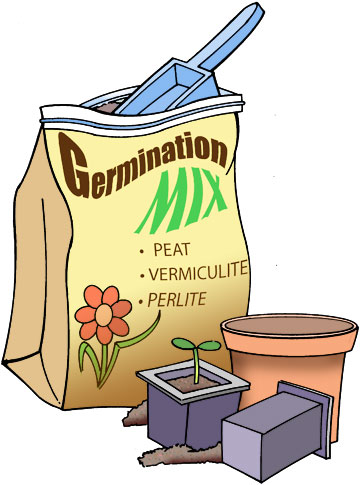 Figure 1
Soilless mixes that are porous and lightweight work well for seed germination.
Vermiculite
Vermiculite is a naturally occurring, micaceous mineral that has been treated with heat, causing it to expand, or exfoliate. When used alone, it provides an environment conducive to good seed germination. It is clean and, if not contaminated during handling, will not need sterilization. If other seeding mixes are used, it is useful for covering seeds because it does not form a crust and allows easy emergence for the seedlings. Vermiculite is available in several size grades. For seeding, a fine grade is best.
Milled sphagnum moss
Sphagnum moss consists of the dried plants growing atop sphagnum peat bogs. When ground, this moss can be used for starting seeds and appears to have the ability to suppress certain seedling diseases. It should be well-moistened before use. Because it contains no nutrients, prompt fertilization is essential after seeds have germinated.
Soilless mixes
Inert mixes that do not contain soil are available for starting seeds. These usually are composed of a combination of peat moss and vermiculite or perlite. They may be purchased ready-made or can be mixed at home. To prepare such a mix, use 4 quarts of vermiculite, 4 quarts of peat moss, 1 tablespoon of superphosphate and 2 tablespoons of pulverized limestone. These mixes have little fertility, so seedlings must be watered with a diluted fertilizer solution soon after they emerge.
Containers for sowing seeds
Containers for starting seeds should be sterile and free from harmful chemicals. Additionally, they should be sturdy and fit into the space available for growing plants in the home (Figure 2). The proper container helps get seedlings off to a good start and often saves work in later stages of transplant production.
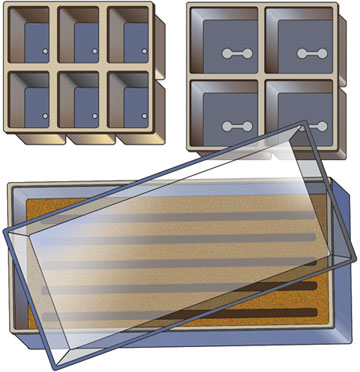 Figure 2
A variety of containers appropriate for sowing seeds indoors are available.
Plastic trays, fiber trays or wooden flats
Plants that are easy to transplant may be seeded directly in trays or flats for later transplanting into individual packs or pots, or wider spacing in flats. Starting seeds in such containers saves space when compared with seeding directly into individual pots. However, when time is more important than space, direct seeding in pots may be preferred, especially for plants with large seeds, such as melons.
Plastic or clay pots
Both plastic and clay pots provide excellent growing conditions for transplants and can be sterilized and reused, if necessary. The transplant with its accompanying root ball must be removed from the pot carefully at planting time. Seeds of certain species may also be planted directly into the pots.
Peat pots
Biodegradable pots made from peat or paper waste fibers can be purchased individually or in strips or blocks. They are porous and provide excellent drainage and air circulation to the root zone. The entire pot can be planted, eliminating the problem of root disturbance at planting time.
Compressed peat pellets
Before hydration, expandable peat pellets are about the size of a silver dollar but somewhat thicker. When placed in water, they swell to form a cylindrical netlike container filled with peat moss, ready for seeding or transplanting. They may be planted directly into the garden. Use the pellets in trays so that they are easily watered and held upright.
Sterilizing containers
Sanitation is of utmost importance to help prevent plant diseases and thus produce quality transplants. Previously used or otherwise contaminated containers should be sterilized before use. Wash plastic or wooden containers thoroughly with soapy water to remove all debris. Then rinse containers by dipping them in a solution of one part chlorine bleach to nine parts water, and allow them to dry before filling with a germination medium.
Peat pots and peat pellets are considered biologically inert; however, be careful not to contaminate them through improper use or storage.
Steps in planting seeds
- Moisten the germination medium to be used. Fill the container to within ¾ inch of the top with the medium. Make sure the container has adequate drainage. Use a clean, small board to level and gently firm the germination medium.
- If seeding a tray or flat, use a ruler or large wooden plant label to make shallow rows 1 to 2 inches apart. When different seeds are used in the same tray, they are easier to keep track of if planted in rows. If only one variety of seed is used, it may be scattered or “broadcast” over the surface.
- Sow the seeds uniformly and thinly in the rows. Many small, round seeds may be slowly dropped in the rows by tapping the package as it is held over the rows. Label each row promptly with plant type, variety and date of planting.
- Plant large-seeded vegetables such as cucumber, cantaloupe and watermelon directly into containers such as peat pots. Other seeds may also be handled this way to save transplanting, but sowing is difficult with tiny seeds. Some small seeds are now available in “pelletized” form to make handling easier. Plant two seeds per pot and later thin to one plant. This saves later transplanting and results in less root damage at planting time.
- Cover the seeds with dry vermiculite or milled sphagnum moss. The depth of covering depends on the size of the seeds. As a general rule, seeds other than especially fine seeds should be covered to a depth about two times their diameter. Most fine seeds, such as petunia and lettuce, need light to germinate and should not be covered.
- Moisten the surface of the medium with a fine mist, or place the container in a pan of warm water to absorb it from the base. Don’t place the container in water that is deep enough to run over the top. Such flooding can mix seeds or cover them too deeply.
- After hydrating the flats or containers, cover them with clear plastic. Large plastic bags work well. Because plastic retains moisture, no additional watering should be necessary until the seeds have germinated and the plastic has been removed.
- Place seeded container in a warm location for germination. Generally, a range from 65 to 75 degrees F is best. A few plants such as larkspur, snapdragon, sweet pea, cabbage, broccoli and cauliflower are best started at about 55 degrees F. Do not place covered containers in direct sunlight.
- Inspect daily for germination. Containers should be moved to bright light and the plastic cover should be removed as soon as germination is well under way. If all the seeds fail to germinate at the same time, cut strips of plastic or cloth, and keep ungerminated rows covered until seedlings appear. Seeds are quickly killed if allowed to dry during germination. Watch closely for development of any disease and, if evident, take control measures promptly. After germination, plants listed as preferring cool temperatures should be placed in a cool location.
Seedling diseases
Newly emerged seedlings are delicate and quite vulnerable to a disease known as “damping off,” which is caused by the fungus Rhizoctonia solani (Figure 3). Symptoms include dark, sunken tissue at the base of the stem, where it enters the propagation medium. Toppling over at the ground line usually follows. Excess moisture, high temperature and poor light stimulate spread of the disease by weakening plants and making them more susceptible to it.
Strict sanitation is helpful in the prevention of damping off. For seeding, use only sterile containers and germination media free from pathogens. However, if damping off should occur, drench the entire medium with a fungicide registered for the control of Rhizoctonia. Prompt action is needed to prevent the disease from spreading to previously healthy seedlings.
 Figure 3
Damping off (Rhizoctonia) is a fungal disease of seedlings that girdles the plant’s stem where it enters the growing medium, causing the plant to topple over.
Growing seedlings
After seeds have germinated, promptly give them the best possible growing conditions to ensure stocky, vigorous plants for outdoor planting. Cultural requirements must be controlled carefully to accomplish this.
Light
Seedlings must receive bright light promptly after germination. Place them in a bright south-facing window if possible. If a large, bright window is not available, place the flats under fluorescent lamps. A fixture containing two 40-watt fluorescent lamps is adequate. A 50:50 combination of cool white and a fluorescent lamp specially designed for plant growing (plant light) is ideal. Place the seedlings about 6 inches from the lamps and keep lamps on for 14 to 16 hours each day. As seedlings grow, the lights may need to be raised to prevent leaf burn from seedlings touching the lamps. LED lighting rapidly is gaining popularity for providing plants with supplemental light. Various types and wattages of LED fixtures are available. Or, LED tubes that can be swapped for fluorescent lamps can be purchased.
Temperature
Most annual plants and vegetables prefer night temperatures from 60 to 65 degrees F (Tables 1 and 2). Day temperatures may run about 10 degrees higher. If temperatures are warmer than this, plants become leggy. Cool-season vegetable crops and a few flowers prefer night temperatures no higher than 55 degrees F and day temperatures near 65 degrees. An unused bedroom, basement or sun porch is often a good location for these plants.
Moisture
Good humidity and adequate water are necessary for producing good plants. A humidifier may be used to help increase relative humidity around the plants, or shallow pans of gravel filled with water may be placed as close to the growing area as possible. Adequate watering implies keeping growing medium moist at all times but never soggy. Allow some drying between watering, but don’t allow seedlings to wilt at any time. Never use water that has gone through a water softener to water plants, especially seedlings.
Fertilization
Seedlings will need some fertilization for best development. Because artificial, or soilless, mixes contain few, if any, nutrients, prompt and regular fertilization is necessary. Use a soluble houseplant fertilizer as sold in garden centers, nurseries or plant supply sections of department stores. Young, tender seedlings are easily damaged by too much fertilizer. Apply fertilizer at about half the recommended strength a few days after seedlings have germinated. After that, fertilize according to the recommendations on the fertilizer label. Water and fertilize carefully.
Transplanting seedlings
As soon as seedlings have developed at least one set of true leaves and are large enough to handle, they should be transplanted to individual pots or packs. Failure to transplant promptly results in crowded, spindly seedlings that may not be able to develop properly. Soilless potting mixes similar to germination media are preferred at this stage of transplant production.
To transplant, carefully dig up the small plants with a clean knife, spatula or plant label. Let the group of seedlings fall apart and pick out individual plants. Occasionally, if seedlings have been too close, they are difficult to separate. Gently ease them apart in small groups, which will make it easier to separate individual plants. Avoid tearing roots in the process. Handle small seedlings by their leaves; small, thin stems break easily.
After filling a container (pack or pot) with moist potting medium, poke a hole into it with a clean dibble (fingers also work well). Make the hole deep enough that the seedling can be put at the same depth it was growing in the seed flat. The size of the container usually is dictated by the size of the mature transplant. Small plants or slow growers are usually transplanted into bedding plant packs containing small individual cells. Rapid-growing, large seedlings should be planted individual pots. After planting, gently firm the medium and water. If seeds were sown in individual peat pots or pellets, thin them to one seedling at this time rather than transplanting them.
Keep newly transplanted seedlings shaded for a few days, or place them under artificial lighting. Keep them away from heat sources or other conditions that would cause rapid water loss. Continue watering and fertilizing as was done in the seed flats.
Vegetables that are easily transplanted include broccoli, cabbage, brussels sprouts, lettuce and tomato. Those with slower root development include cauliflower, celery, eggplant, onion and pepper. Plants that do not transplant well and therefore are seeded in individual pots include cucumber, muskmelon, squash and watermelon.
Most flowers normally grown indoors transplant well, but a few are difficult to transplant. These include poppy, larkspur, lupine, sweet pea and cornflower. If started indoors, this group of plants should be directly seeded into small containers.
Moving plants outdoors
Hardening
Plants that have been growing indoors under carefully controlled conditions are susceptible to transplant shock when moved to the garden. To prevent this from occurring, they should be “hardened” before planting outdoors.
The process of hardening involves subjecting transplants to cooler temperatures and giving them less fertilizer and water to “toughen” them. Hardening should be started about two weeks before planting in the garden. If possible, move plants to a shady, outdoor location with cooler temperatures. A cold frame is excellent for this purpose. When plants are first put outdoors, keep them in the shade, but gradually move them into sunlight for short periods each day, gradually increasing the length of exposure. Don’t put tender seedlings outdoors on windy days or when temperatures are below 45 degrees F. Reduce the frequency of watering to slow growth, but don’t allow plants to wilt. Even cold-hardy plants such as cabbage and pansy will be hurt if exposed to freezing temperatures before they have been hardened. After proper hardening, however, they can be planted outdoors, and light frosts will not damage them.
Planting into the garden
When plants have grown large enough to handle easily and hardening is complete, they may be planted into the garden when weather and soil conditions permit.
Carefully remove plants from the packs or pots in which they have been growing; take care to disturb the roots as little as possible. Dig a hole about twice as large as the root mass of the transplant. Set the transplant at about the same level it had been growing in the container. A few plants such as tomato and marigold are able to develop roots along the stem. If they have become leggy, they may be planted deeper than they were previously growing. Place soil loosely around the roots and apply about 1 cup of a starter solution. This solution is made by dissolving 1 tablespoon of high-phosphorus fertilizer, such as 9-45-15, in 1 gallon of water.
Transplants grown in peat pots or peat pellets can be planted with the pot or pellet intact. Breaking the base of the peat pot may help improve root penetration and drainage. Make sure the top edges of the pot are thoroughly covered with soil. Failure to do so exposes the pot edge, which acts as a wick and evaporates moisture from around the root ball. This delays root penetration or even causes the plant to dry up on hot, sunny days.
Transplant into the garden on cloudy days if possible. In warm, sunny weather, cover the new transplants with newspaper tents or some other type of shading for two or three days or until they are well established. Water plants as needed, making sure to apply water at the base of the plants until roots have had time to develop more fully.
Original author: Ray R. Rothenberger, Department of Horticulture
Audio clips
Audio clip 1
Clean containers are extremely important for good germination and prevention of disease. These petunia seedlings are heavily seeded and will need prompt transplanting soon.
Audio clip 2
Watch for fungi growth and treat the spots promptly to prevent spread.
Audio clip 3
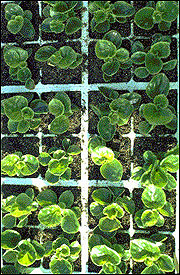
These begonia seedlings have been transplanted into individual sections of a tray for development until they can be moved directly to the garden