 Developed by Barbara Willenberg
Revised by Susan Mills-Gray
State Nutrition Specialist
Dehydration is one of the oldest methods of food preservation, though methods for drying food have become sophisticated over time. For many people, dehydrating food at home is a convenient way to preserve foods.
Benefits
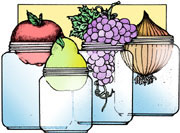
Molds, yeast and bacteria need water to grow. When foods are sufficiently dehydrated, microorganisms cannot grow and foods will not spoil. Dried fruits and fruit leathers may be used as snack foods; dried vegetables may be added to soups, stews or casseroles. Campers and hikers value dried foods for their light weight, keeping qualities and ease of preparation.
Nutritional value
The nutritive value of food is affected by the dehydration process. Vitamins A and C are destroyed by heat and air. Using a sulfite treatment prevents the loss of some vitamins but causes the destruction of thiamin. Blanching vegetables before drying, while crucial to a better quality product, results in some loss of vitamin C and B-complex vitamins as well as the loss of some minerals, because these are all water soluble. Yet blanching reduces the loss of thiamin and vitamins A and C during dehydration and storage.
Dried foods have more calories on a weight-for-weight basis because of their nutrient concentration. For example, 100 grams of fresh apricots has 51 calories, whereas 100 grams of dried apricots has 260 calories. Nutritive value, as well as flavor and appearance, is best protected by low temperature and low humidity during storage.
Dehydration methods
Foods can be dehydrated by various means: the sun, a conventional oven, an electric dehydrator, a microwave oven (for herbs only), air drying and solar drying. Dehydration, like other preservation methods, requires energy. Unless sun drying is possible where you live, the energy cost of dehydrating foods at home is higher than for canning and, in some cases, more expensive than freezing.
-
Electric dehydrators produces a better-quality dried product than any other method of drying. Electric dehydrators are self-contained units with a heat source, a ventilation system, and trays to place the food on. Models vary in sophistication and efficiency, so choose options that you desire. Although an electric dehydrator requires a fairly high initial investment, it maintains low temperatures and uses less energy than an oven.
When using a dehydrator, load food on trays in single layers so that pieces do not overlap. This arrangement allows air to circulate through the trays. Large pieces, such as apricot halves, should be turned halfway through the drying time. Pieces near the sides of the tray should be moved to the center. Stir small pieces every one to two hours, separating bits that stick together. It may be necessary to rotate the trays within the dryer at least once during the drying period to ensure uniform drying. Follow manufacturers’ guidance for heat settings for specific foods.
-
Oven drying requires little initial investment, but continual use of an oven for drying is not recommended because ovens are less energy-efficient than dehydrators, and energy costs tend to be high. Overall oven-dried foods are usually darker, more brittle and less flavorful than foods dried by an electric dehydrator.
An oven takes 2 to 3 times longer to dry food than a dehydrator. Drying in an oven is slower because ovens do not have built-in fans for the air movement It is difficult to maintain a low drying temperature in an oven, and foods are more susceptible to scorching at the end of the drying period. Check oven settings to see if it has a reading as low as 140° F or a “warm’ setting. If the thermostat does not go this low, your food will cook instead of dry. Use an oven thermometer to test the temperature of the oven at its lowest setting.
Trays upon which the food is placed must be at least 1½ inches narrower than the inside of the oven to allow for air circulation. Allow at least 2½ inches between trays and 3 inches of free space at the top of the oven for good air circulation.
About 4 to 6 pounds of food can be dried in an oven at one time. Place food on drying trays, or on wire cooling racks covered with cheesecloth or nylon netting, to allow easy removal of dried food. Pieces of food should be in a single layer. Do not place food directly on oven racks. Cookie sheets are acceptable only for fruit leathers, which do not require good air circulation.
Keep oven door propped open at least 4 inches. Place a fan outside the oven door to aid air circulation. Move it from side to side occasionally. The room also should be well ventilated. Oven drying, particularly if a fan is used, should be done with caution if small children are around.
Maintain the temperature at 140° F. Watch the temperature even more carefully toward the end of the drying process. To prevent scorching, lower temperature to 120° F if possible. Examine the food often and turn trays frequently, removing foods as they dry.
- Microwave drying is a quick way to dry small quantities of herbs and some leaf vegetables, but it is not successful for most other foods. Food which has been microwave dried often tastes overcooked rather than dried. Follow manufacturers’ guidance.
- Air drying can be done indoors in a well ventilated attic, room or screened-in porch. Herbs, hot peppers and mushrooms are the most common air-dried items. Herbs and peppers are not pretreated, but simply strung on a string or tied in bundles and suspended until dry. Enclose them in paper bags to protect them from dust or other pollutants.
- Sun-drying is not recommended in the midwest due to high humidity. Foods dried in the sun can take 3–4 days to dry; if the humidity is high, as is generally the case in Missouri, the food will mold before it dries. Sun-drying requires constant exposure to direct sunlight during the day and a relative humidity of less than 20%. These conditions are found only in the southwestern states.
Dehydration basics
Drying times in conventional ovens or dehydrators vary considerably depending on the amount of food dried, its moisture content, room temperature and humidity level — and in the case of oven drying, the use of fans. Some foods require several hours, and others may take more than a day. General guidelines include:
- Fruits (125 to 135 degrees F)
- Vegetables (115 to 130 degrees F)
- Meat/jerky (155 degrees F)
- Herbs (95 to 105 degrees F)
Interrupting drying time, or prolonging it by using lower temperatures, may result in spoilage.
Different foods that require similar drying times and temperatures can be dried together. Vegetables with strong odors or flavors (garlic, onion and pepper) should be dried separately.
Air temperature and circulation must be controlled during the drying process. If the temperature is too low or the humidity too high (resulting in poor circulation of moist air), the food will dry more slowly than it should and microbial growth can occur. Watch temperatures closely at the beginning and end of the drying period. If the temperature is too high at first, a hard shell may develop on the outside, trapping moisture on the inside. This condition is known as case hardening and leads to a moldy food product. Temperatures that are too high at the end of the drying period may cause food to scorch.
Determining dryness. Judging when food is dry requires experience. It is better to overdry than to underdry. When in doubt, continue drying for an additional 15–30 minutes. Check for doneness. Allow the product to cool before testing.
Vegetables are sufficiently dried when they are leathery or brittle. Leathery vegetables will be pliable and spring back if folded. Edges will be sharp. Corn and peas will shatter when hit with a hammer.
Fruits are adequately dried when moisture cannot be squeezed from them, and if they are tough and pliable when cut. Fruit leathers may be slightly sticky to the touch but should separate easily from the plastic wrap.
Meats should be extremely dry unless they are to be refrigerated or frozen for long-term storage. Meat is sufficiently dried when it is dark-colored and fibrous and forms sharp points when broken.
Herbs are dried when brittle. Their leaves shatter when rubbed together.
After drying, even when a food tests dry, it may not be uniformly dry. Therefore, conditioning and pasteurizing should be done before storing.
Conditioning is the process used to equalize, or evenly distribute, moisture left in the food after drying. It is usually done to fruits, herbs and seeds to improve storage, because it decreases the chance of spoilage, especially by molds. To condition a food, follow these steps:
- Cool foods on trays.
- Pour into a large, nonporous container of food-grade material; fill to about two-thirds full.
- Cover container and shake container daily or stir contents at least once a day for 10–14 days.
- Check for condensation on the lid and any signs of spoilage. If condensation occurs, return food to the dryer to finish the product. Recondition after it is dry.
- Cool thoroughly before packaging.
Freshly dried fruit can be added to the conditioning batch within the first five days. Conditioning time will need to be lengthened to accommodate the additional food.
Caution
If any sign of mold growth occurs, destroy the product.
Pasteurizing is recommended for foods that have been contaminated before or during storage. It can be used as a second treatment for vegetables held in storage if the vegetables do not have any mold on them. Keep in mind that this treatment can cause quality changes. To pasteurize, use one of the two following methods:
- Freezer — Seal dried food in a heavy, plastic bag after drying (and conditioning, if necessary). Place in a freezer at zero° F for a minimum of 48 hours.
- Oven — Place the food in a single layer on a tray or in a shallow pan. Place in an oven, preheated to 160°F, for 30 minutes. Cool and package for storage.
Package dried foods in glass jars, food-grade plastic storage containers, or plastic food-storage bags. Make sure the package has an airtight seal. It is a good idea to package dried foods in small amounts, because after the package is opened, the food can absorb moisture from the air and quality deteriorates.
Store containers of dried foods in a cool, dark, dry area, such as a basement or cellar. Exposure to humidity, light or air decreases the shelf life of foods. The lower the temperature, the better: Foods stored at temperatures under 60° F will keep about one year. At 80–90° F, the food begins to deteriorate within several months.
Selecting an electric dehydrator
Because an electric dehydrator can be an expensive investment, choose a specific brand or model carefully.
Space requirements
Dehydrators vary in size and can be round, square or rectangular. You will need to find a convenient space to operate it. Place the dehydrator near an electrical outlet so that extension cords are not necessary. You should have room to open the door or lid to easily load and rotate the trays. When deciding where to put the dehydrator, keep these points in mind:
- Food will give off humidity
- Some foods will give off strong odors, for example onions
- The fan will create noise
- The appliance will give off heat
Heat control
The dehydrator should allow you to select heat settings from 85–160° F and should have a thermostat to maintain the selected temperature. The heating element should be enclosed so that it does not present a shock or burn hazard. Some models have timers and automatic shutoffs. Controls should be located on the front of the dehydrator for ease of use. Check the instructions to see how often the trays need to be rotated to ensure even drying.
Air flow
Good air flow is extremely important in removing moisture from food. As much food surface as possible should be exposed to warm, dry, moving air. Some dryers use natural convection only; others use a fan. The addition of a fan will make even air circulation more likely. A fan with two speeds is desirable. High speed is used at the beginning of the drying period when moisture is readily available at the surface. Low speed is then used to slowly remove the remaining moisture.
The two basic kinds of air flow systems are horizontal and vertical. Horizontal flow moves air across the top and bottom of food and is considered the best system. Vertical air flow is more easily blocked by food trays and requires rotating trays to ensure even drying.
Trays
Tray edges should be a quarter- to a half-inch high to prevent food from spilling or falling off and to allow air to circulate. There should be four to 10 open-mesh trays of sturdy lightweight plastic for drying. The mesh size of the screening material should be large enough to allow air to circulate yet small enough to prevent food falling through. Finally, the trays should be easy to clean and lightweight.
Door
The door should be easy to open and close. Doors may swing up or down, right or left. Some are removable. You may need both hands to load and unload the food trays so the door should stay in an open position by itself. It should seal well and have strong hinges and latches that will withstand repeated use as well as heat and humidity.
Cabinet
The cabinet should be built of a material that does not warp or get hot when in use—double-wall construction of metal or plastic. It should be nonflammable and easy to clean.
Safety and warranty
Look for the UL label and a grounded plug. Check the length of the warranty and what it covers. Also, verify that replacement parts are available. Arranging food layers.
Capacity
Use common sense. If the capacity of the dehydrator does not look large enough to accommodate the size of the loads you will dry frequently, it will not be a good buy.